Setup - Why Codes
Last updated: September 23, 2026
Overview
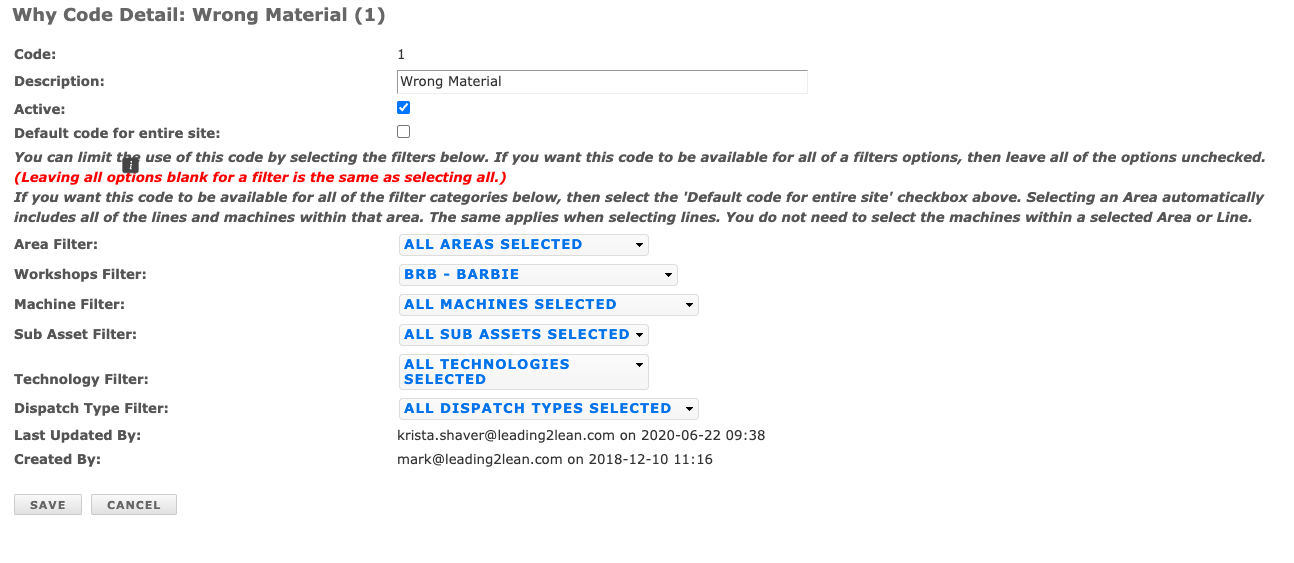
Why Codes are used during dispatch events to capture the reason an action was taken on a component. For example: Action – Replaced, Component – Blade, Why – Cracked.
Prerequisites & Preparation
Required Permissions: System Manager or Administrator
Step-by-Step Configuration
Navigate to the Menu: Go to Setup > Why Codes.
Initiate Creation: Click Add New in the upper right corner of the Why Codes bar.
Enter Details:
Description: Enter the Why Code description.
Define Attributes:
Default: Check this option if the code should be available for all events across the entire site. Leave unchecked if the code applies only to specific event types and/or machine(s), and select the applicable criteria below (Area, Line, Machine, Dispatch Type, etc.).
Note: Selecting Line(s), Machine(s), or Technology(s) applies the code to machines based on those selections. For example, selecting Line A and Technology Weld would apply the code to all machines on Line A and all machines tied to Weld technology sitewide.
Selecting Dispatch Type(s) further narrows this: the code will only apply to the selected Dispatch Type(s) within the selected Lines, Machines, and Technologies. For example, adding "Code Red" as the Dispatch Type to the prior example would apply the code only to Code Red events on Line A and Weld-technology machines.
Save & Finalize: Click Save.