Dispatch Portal
Last updated: August 26, 2026
Dispatch Portal Overview
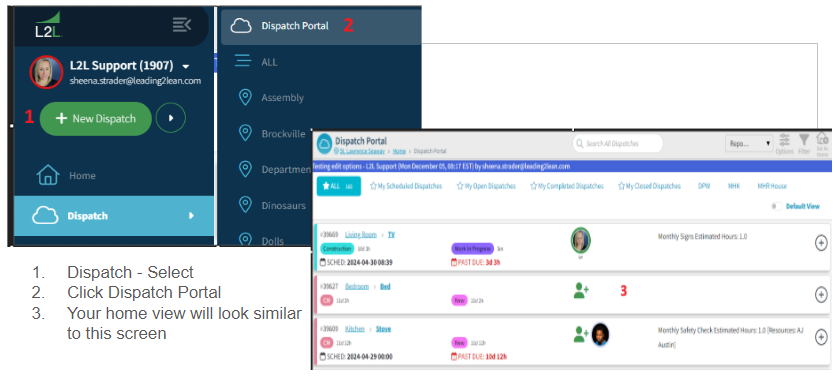
Overview
The Dispatch Portal displays dispatches in a card view for easy visibility and quick action.
How It Works
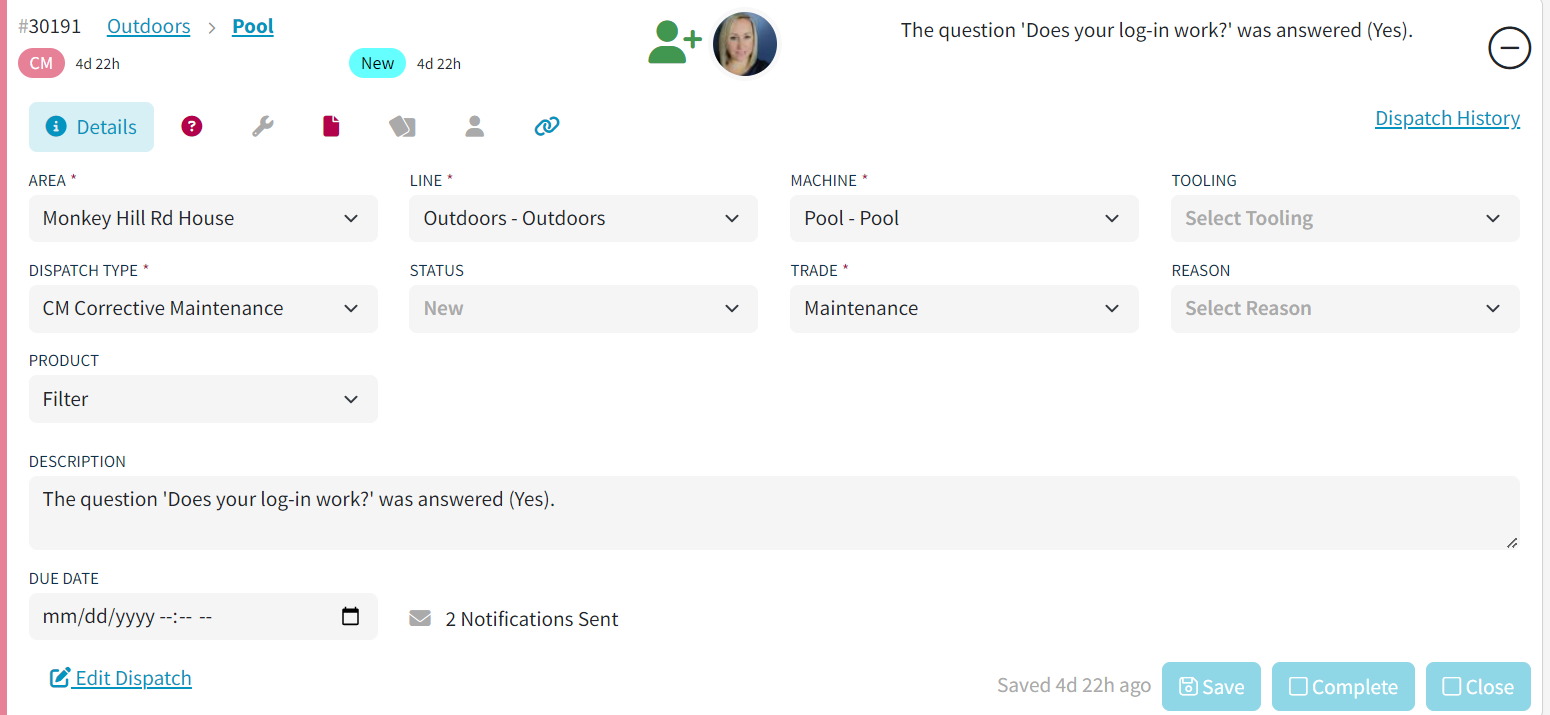
Click anywhere on a dispatch card to expand it and view details.
A “+” icon indicates the card is collapsed.
Use the Options menu (top right) to customize what appears in the collapsed view.
You can also open Execution AI from the upper-right corner of the Dispatch Portal. In the Execution AI panel, use the menu icon to show or hide chat history, and use the Fullscreen icon to expand or exit the chat window. The prompt field includes a microphone icon for talk-to-text prompts. For detailed setup and usage guidance, see L2L Execution AI.


Each tab in the expanded view is color-coded for quick visibility:
🔴 Red ! → Required action needed to close the dispatch
🔵 Blue ! → Information added or required task completed
⚪ Gray → No information available in that tab
This allows you to quickly identify what needs attention.
Dispatch Tabs (Expanded View)
When you expand a dispatch card, you’ll see several tabs:
Details Tab
The Details Tab contains core dispatch information.
Here you can:
Update Area, Line, Machine, Tooling
Edit Dispatch Type, Status, Trade, Reason, Product
Add or edit descriptions
Adjust Due Date
View notification history
Questions Tab
A “?” icon indicates dispatch-specific questions.
🔴 Red “!” means required questions must be answered.
Click the icon to view and complete them.

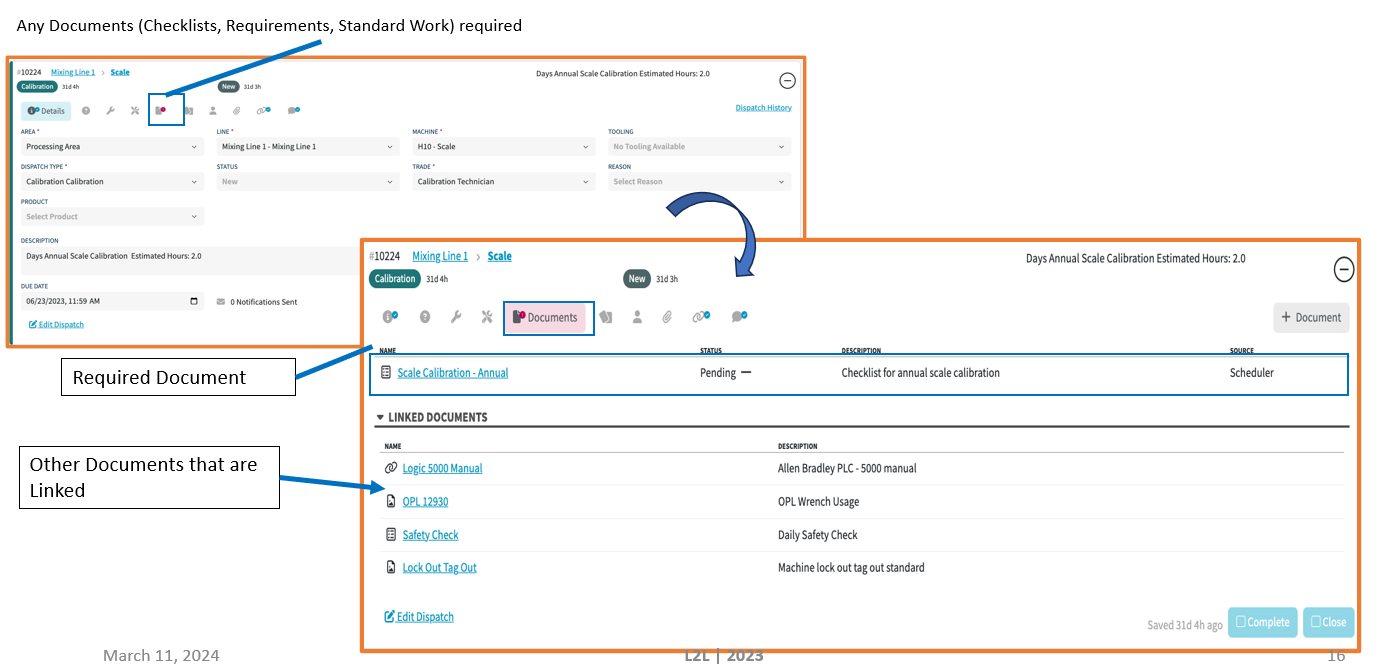
Documents Tab
The Documents tab includes:
Attachments
Linked documents
Checklists
You can:
View all related documents on one screen
Add new documents
Track checklist completion status
Resources Tab
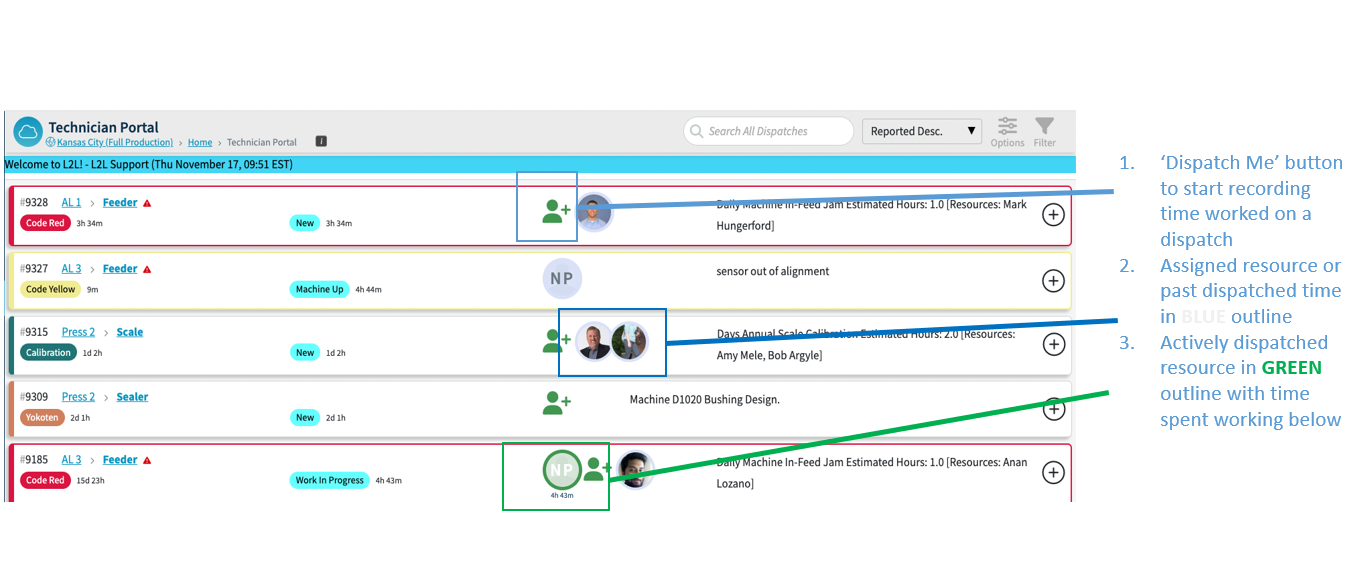
When viewing in the expanded card view you will notice a Person Icon. By clicking on this, you can easily see who is assigned, has been dispatched, or is currently dispatched, as well as who submitted the request.
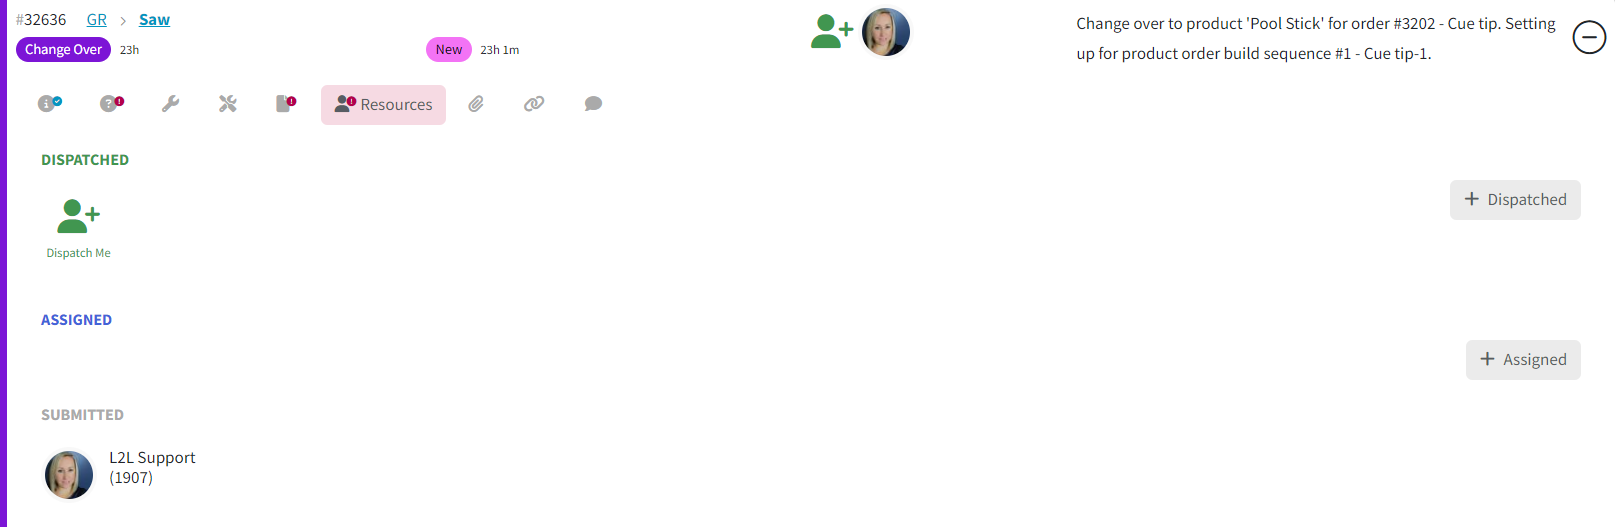
Here you can:
See who is Assigned
See who is Dispatched
View who submitted the request
Add resources using +Assigned or +Dispatched
Note: For dispatches that have already been launched, you must assign resources individually using the +Assigned button on each dispatch. Bulk assignment is not available for launched dispatches.
Access Resource Time tracking
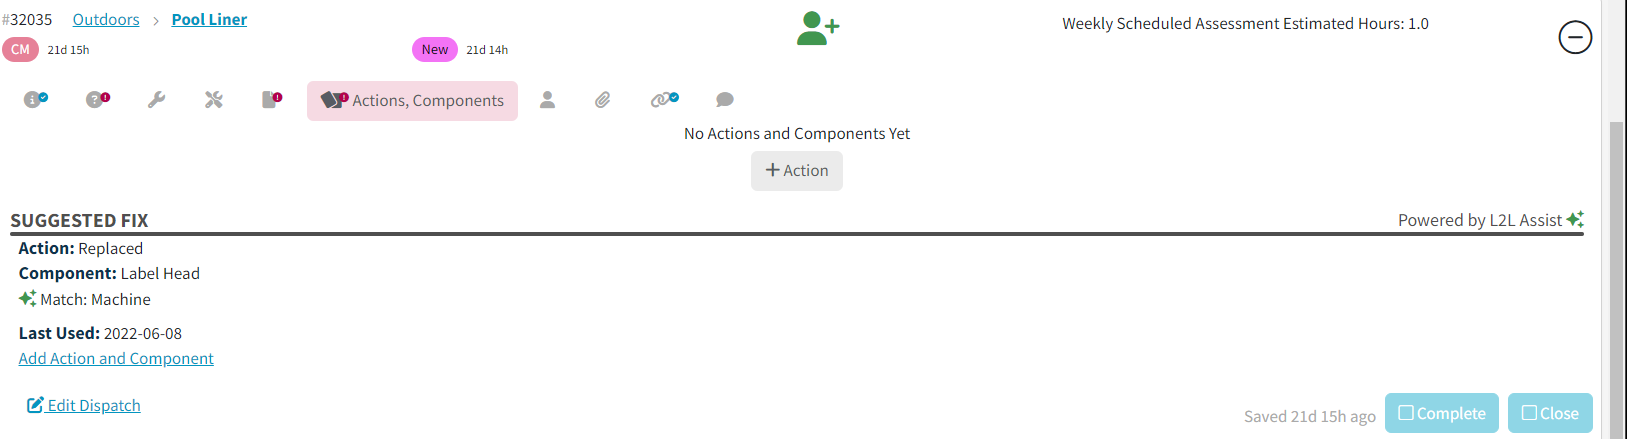
Actions/Components Tab
The system can suggest likely fixes based on:
Machine
Dispatch Type
Historical data
It displays the top 3 likely solutions.
You can:
Click Add Action & Component to select a suggestion
Click +Action to manually add or edit actions
Related Tab
View relationships to:
Work Orders
Schedules
Follow-up Dispatches
You can also launch:
Follow-up Dispatches
Work Orders
Schedules
Yokoten
Kaizen

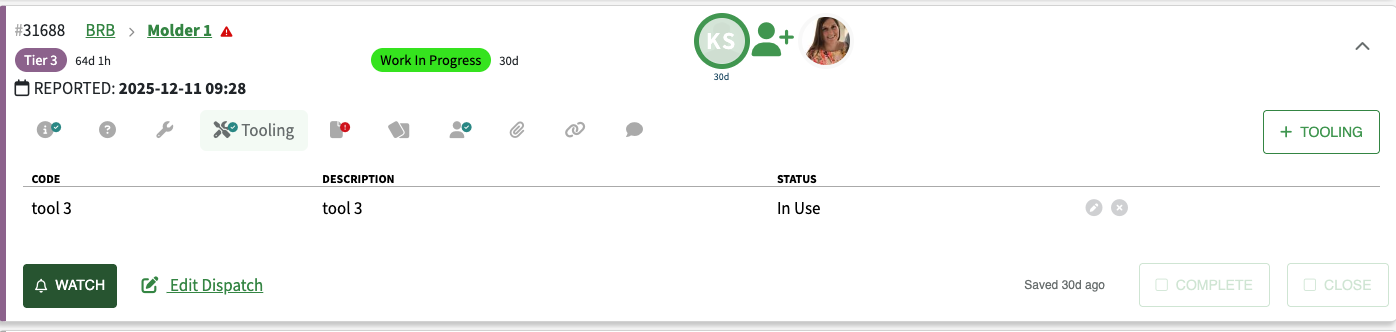
Tooling Tab
View all tooling associated with the dispatch
Add or edit tooling
A ✔ checkmark indicates tooling is assigned
Notes Tab
View all notes in one place
Add new notes
Notes display with timestamp and user name

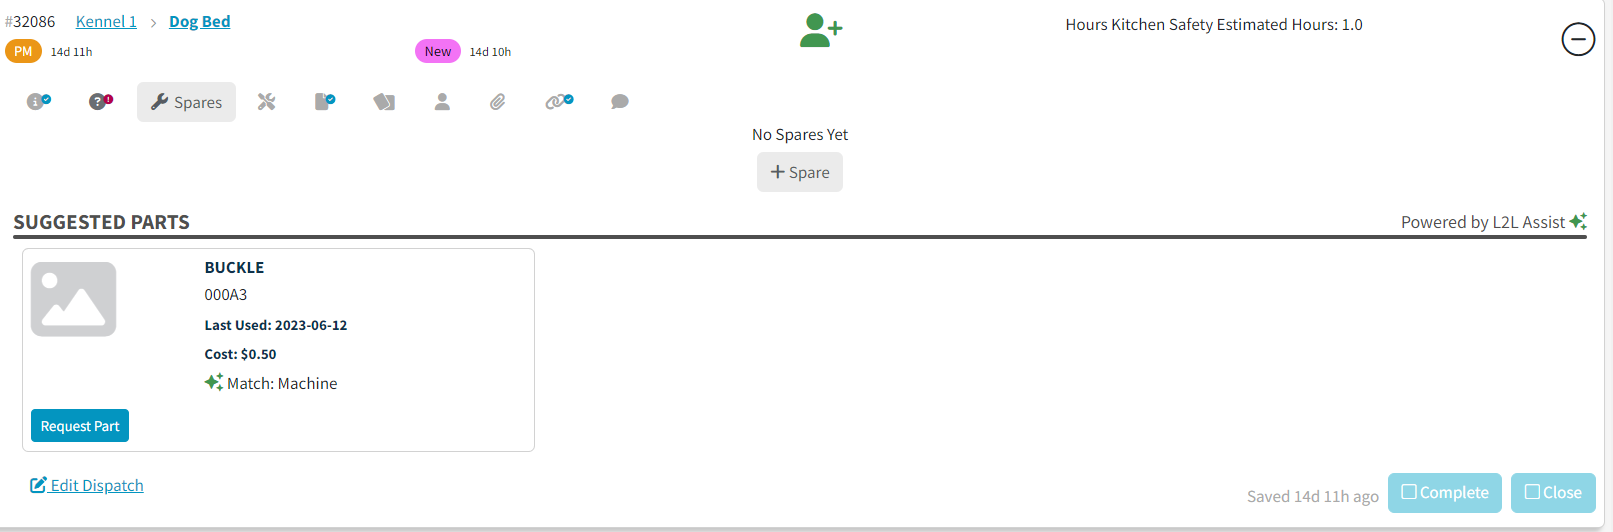
Spares Tab
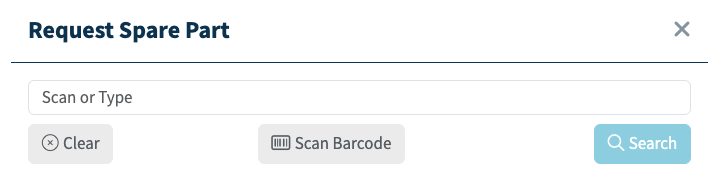
Request spare parts directly within the dispatch — no need to leave the screen.
When clicking +Spares:
A request window opens over the dispatch
You can search or scan a barcode
Searchable fields include:
Part Number
Short Part Number
Vendor Part Number
Manufacturer Part Number
Description
Location
Warehouse
Suggested Parts
Based on machine history and similar past dispatches, the system suggests likely spare parts — helping technicians reduce research time.
Completing & Closing a Dispatch
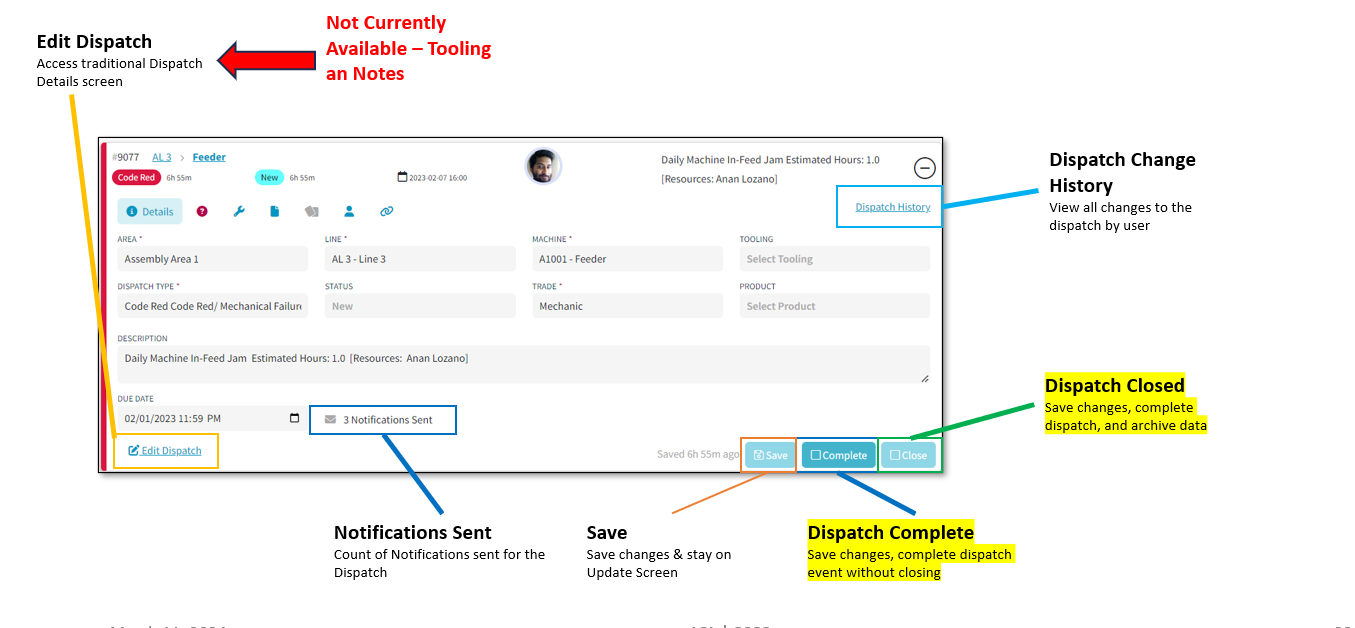
At the bottom of the expanded card:
Complete → Marks work as finished
Close → Completes and closes in one step
Need to Reopen?
If something was missed:
Click Closed or Completed
Select Reopen
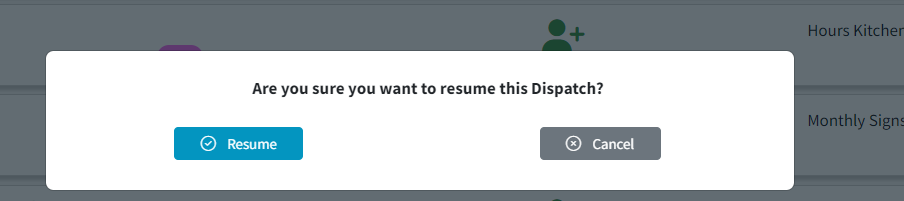
Resume work (time tracking restarts if resumed)

Setting Dispatch Portal as Default View
You can make the Dispatch Portal your default landing page.
Option 1: Site-Level Setting- L2L can enable it for all users.

Option 2: Personal Setting:
Click your Username in the top left
Select User Settings
Find Dispatch View
Choose between:
Dispatch Portal
Classic
Click Save

Note: After switching to Classic view, an "All" option will appear in the Dispatch menu which can be used to access the classic version of Dispatch.
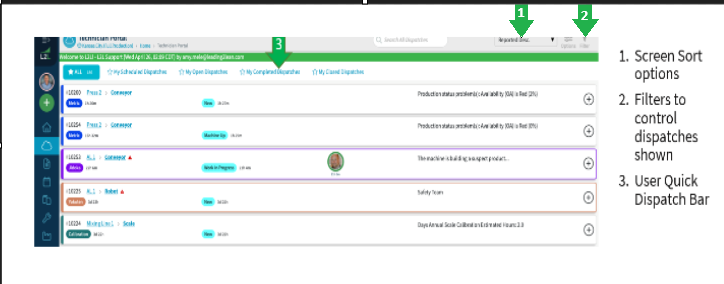
Filter Menu
Pre-Built Views
All
My Scheduled Dispatches
My Open Dispatches
My Completed Dispatches
My Closed Dispatches
Filter By Options
Area, Line, Machine, SubAsset, Dispatch Type, Line Categories, Machine Attributes, Trade, Value Stream, & Technology
Dispatch Status (New, Machine Up, Idle, Waiting Parts, etc.)
Impact (Down, Impacting, Planned Work, No Impact)
Time Frame (Last 15 minutes → Due within 5 days)
Assigned Resources
My Dispatches (Assigned, Dispatched, Submitted)
There is also a checkbox to filter for critical machines
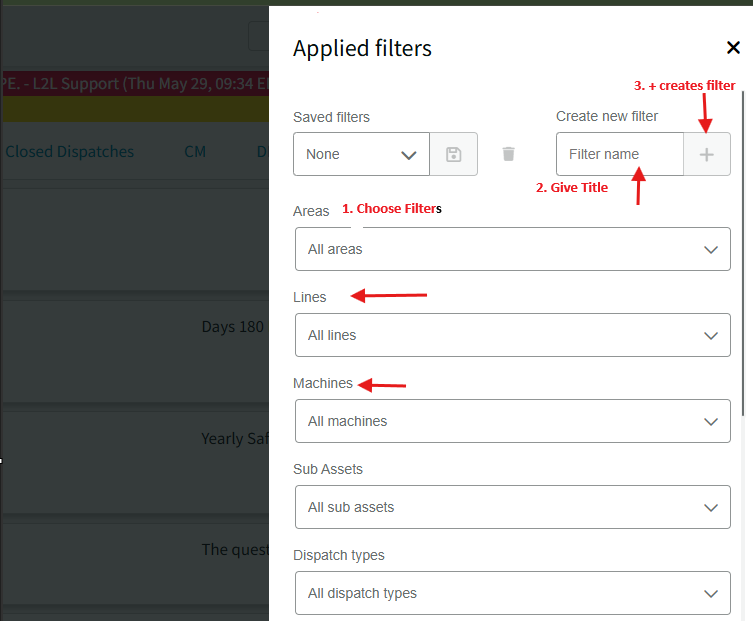
Creating, Saving and Sharing Filters
You can:
Save custom filters
Exclude Closed dispatches
Name and store your preferred views
Set your landing page using Set as Home
You can:
Save custom filters
Exclude Closed dispatches
Name and store your preferred views
Set your landing page using Set as Home
Creating a Saved Filter
Share a saved Filter
When you share a link, recipients will see the same filtered view that’s on your screen — making it easier to align on specific dispatches without additional instructions.
This helps streamline collaboration and ensures everyone is looking at the same data.

View Options
Enabling any of the below, will make it visible in the collapsed view of the Portal.

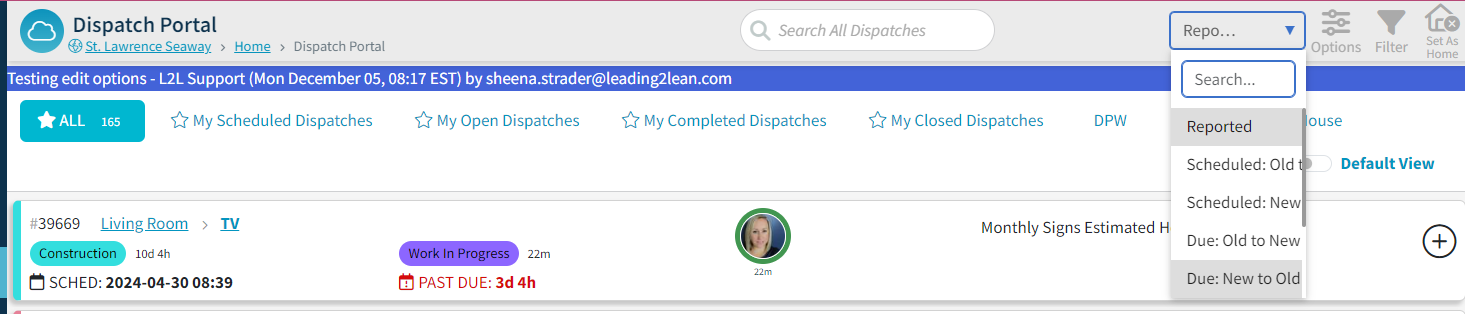
Sorting & Priority
Sort dispatches by:
Impact (The system will automatically surface this information when users sort by Impact, ensuring the most critical consolidated issues are prioritized. There is also a setting in the View Options to show Impact even when not sorting by Impact.)
Priority
Priority Due
Status Time
Reported Date
Scheduled Date
Due Date
Sorting Notes:
Priority → Lowest number first
Impact → Highest impact first (Down → No Impact)
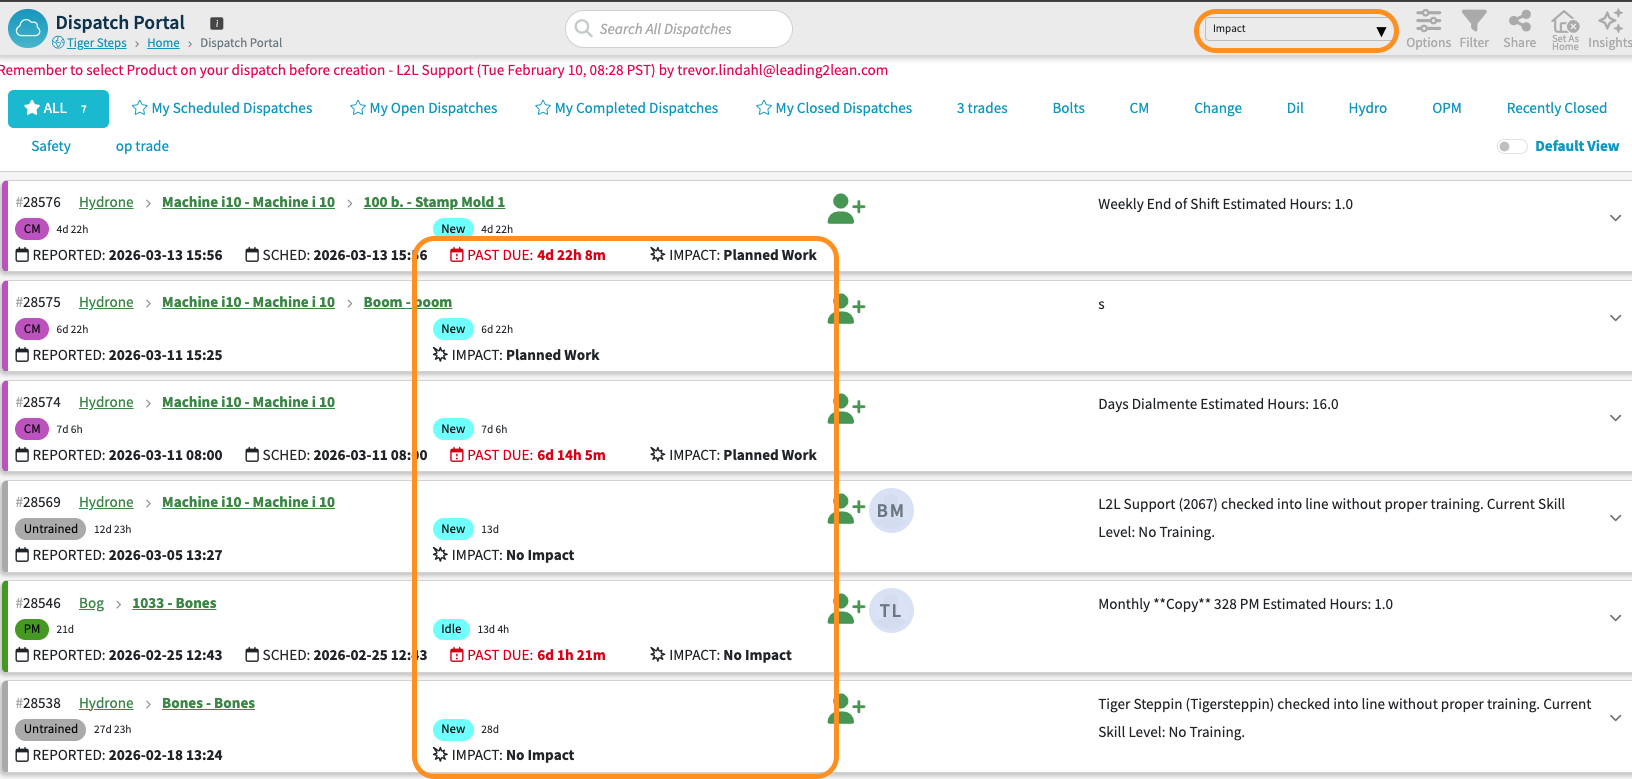
From the main Dispatch Portal page:
Click the Line name → Opens Line History
Click the Machine name → Opens the Machine Dashboard
The Calendar icon indicates a scheduled date (set by planners, managers, or schedulers)
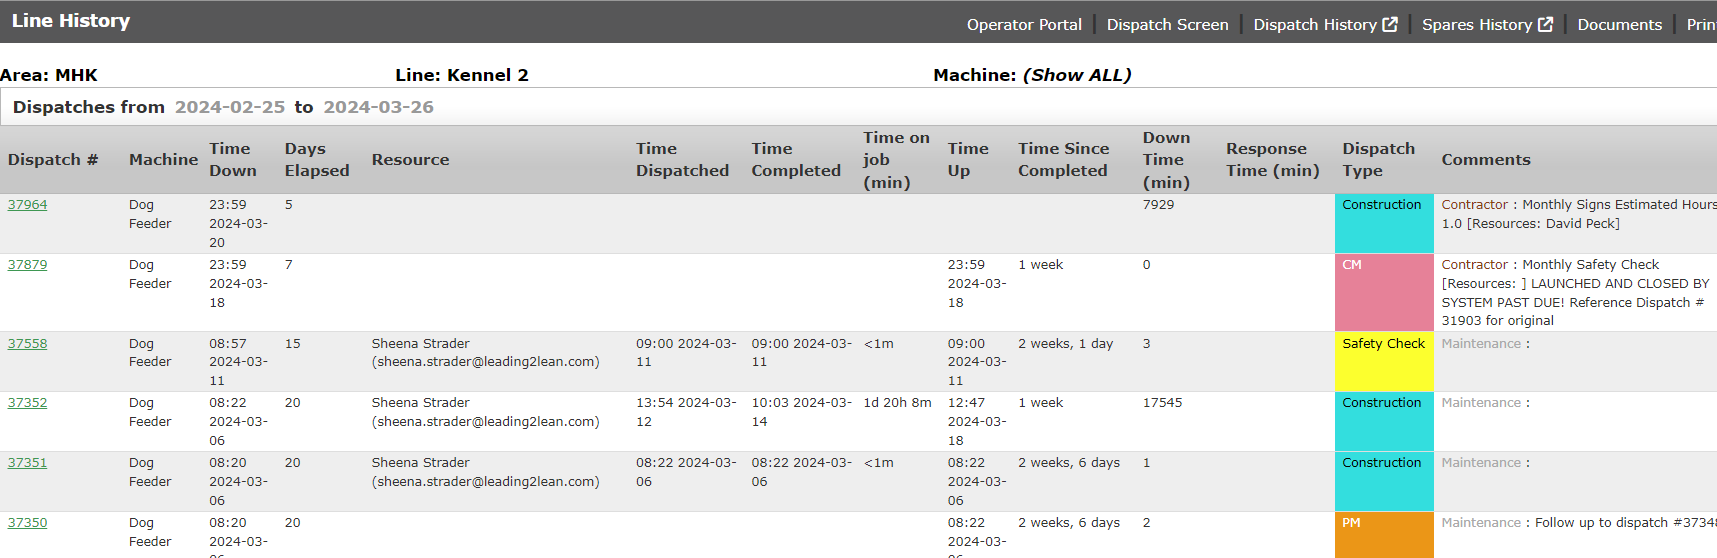
The Calendar Icon and date on a dispatch card will show if there is a scheduled date set. (Of note, scheduled dates are only set by planners, managers, or work order schedulers)
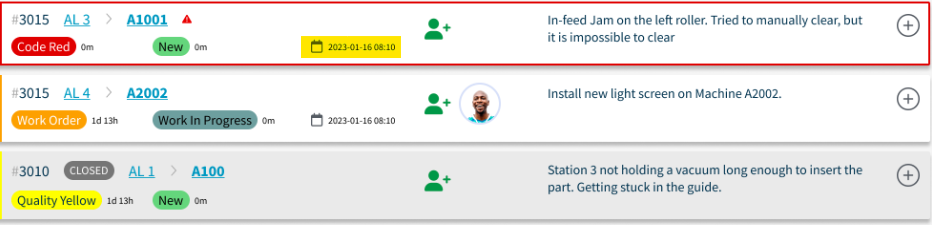
By clicking on the machine within the dispatch card you will now be brought to the Machine Dashboard.
Dashboard view:

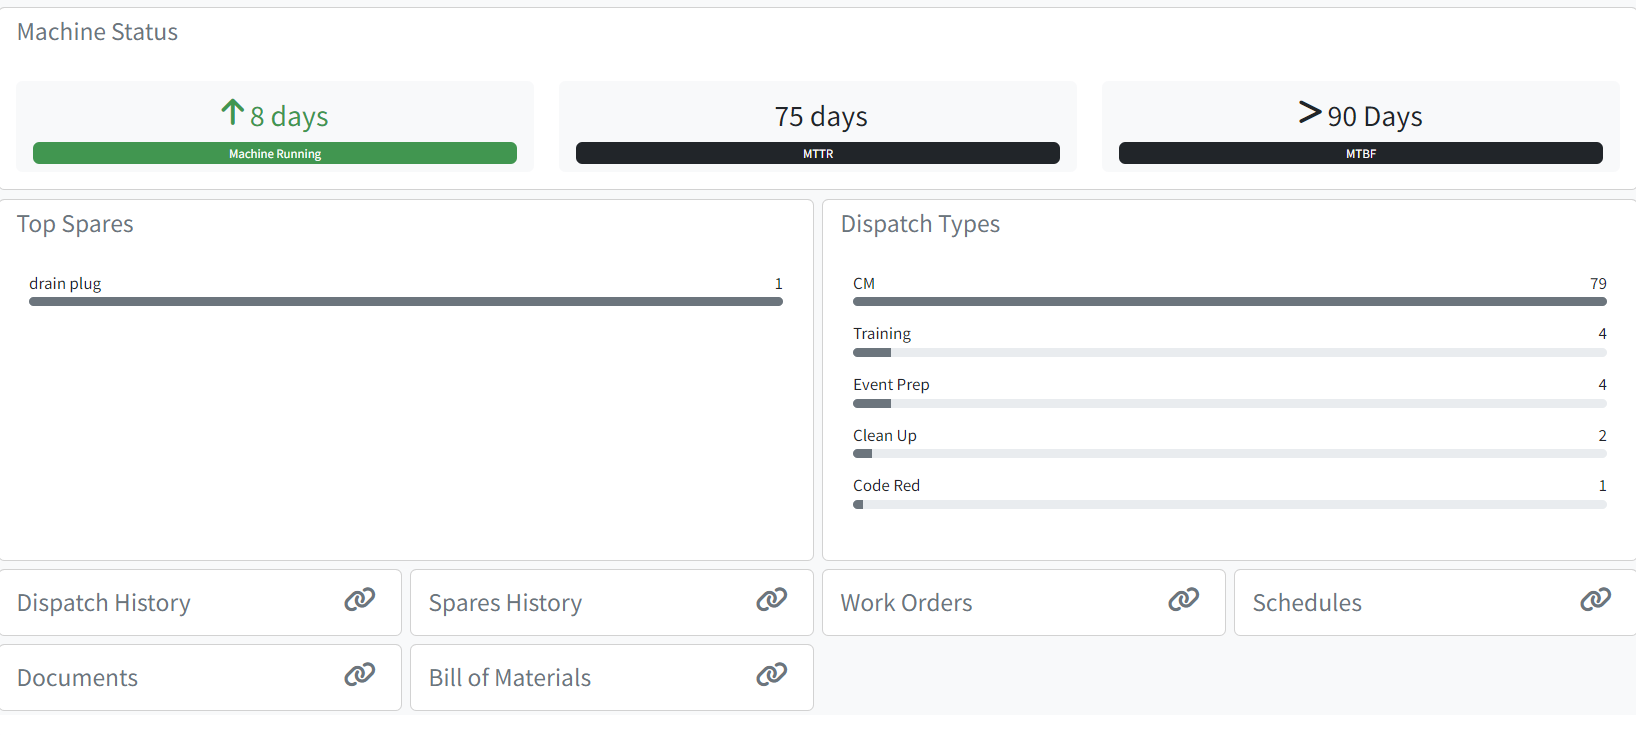
Dispatch Portal - View Machine View History
