Spares File Import
Last updated: November 18, 2026
Managing your spare parts inventory in L2L can be done through the Spares File Import tool. Understanding the difference between a Full Sync and a Partial Sync, as well as how to properly format and map your spreadsheet, is key to avoiding unintended data loss.
Always export your current spares as a backup before performing any import. Go to Spares > Inventory Control to export your current list. This gives you a restore point if anything goes wrong and provides a pre-formatted template with the exact column headers L2L expects.
Full Sync vs. Partial Sync
Choosing the right import type depends on whether you are replacing your catalog, making bulk updates, or simply adding new items.
Import Type | What It Does | Best Used For |
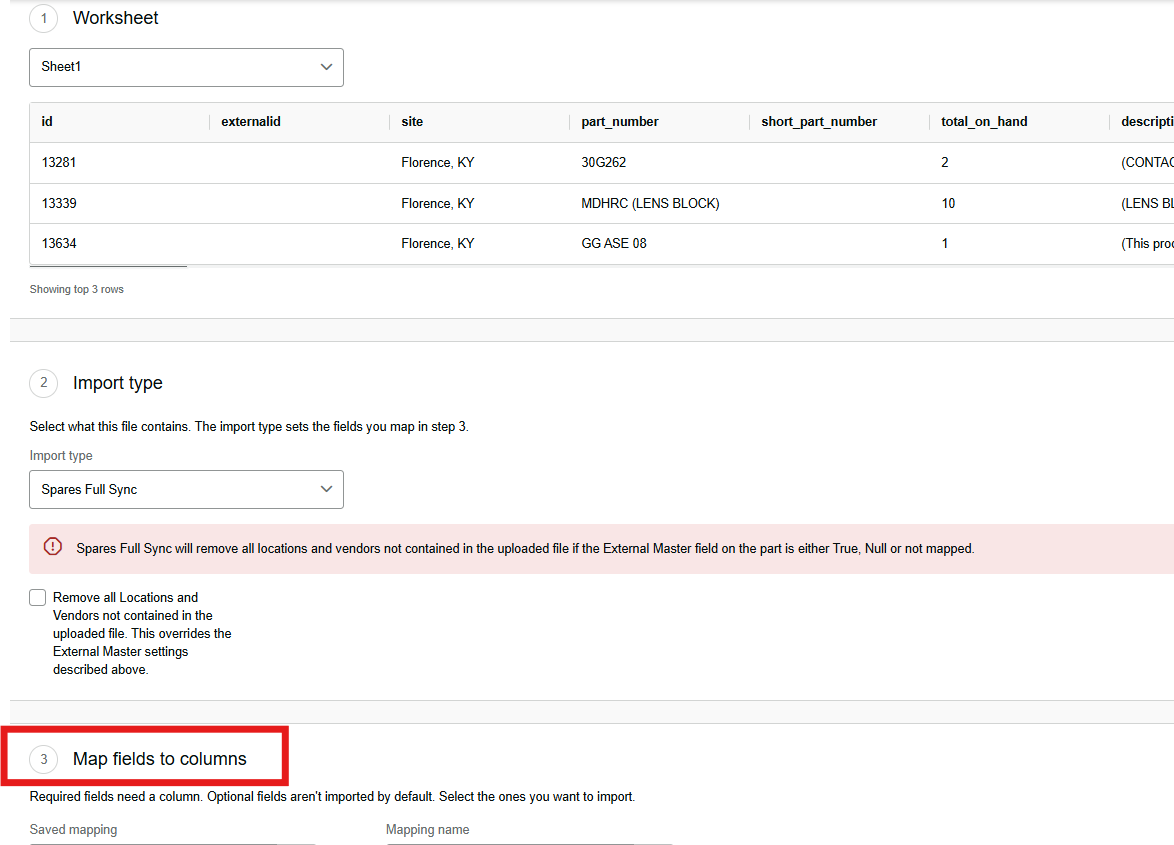
Spares Full Sync | Overwrites all existing spares data. Any parts not included in the import file will be deactivated. Also removes locations and vendors not present in the file if External Master is set to True or left unmapped. | Large updates, bulk edits to existing parts, or syncing from an external ERP/MRO system. |
Spares Partial Sync | Adds new parts without affecting or deactivating existing ones. | Adding net-new parts when you do not want to replace the entire list. |
How to Add New Parts Without Losing Existing Data
Option 1: Full Sync (Recommended for large updates)
Go to Spares > Inventory Control and export your current spares list.
Save a copy of the exported file as a backup.
Add your new parts (and make any edits to existing ones) directly in the exported file.
Re-import the updated file using Spares Full Sync.
Option 2: Partial Sync (Best for adding new parts only)
Use Spares Partial Sync if you only need to add new parts and do not need to update existing records.
Important: If you use a Partial Sync to update fields on existing parts, make sure all relevant fields are included in your file—otherwise, omitted values may default to 0.
Preparing Your Import File
The easiest way to get a correctly formatted file is to export your existing spares, as the export already uses L2L's standard column headers.
Required Fields: Fields marked in red in the template notes must be filled in. Common required fields include:
Part Number
Description
Min Quantity
Max Quantity
Bin Quantity (total on hand)
Multiple Bin Locations & Vendors: Spares exports list separate rows for parts with multiple vendors or bin locations. When setting up multiple bin locations in your spreadsheet, create a separate row for each bin location of the part, fill in the Bin Qty column, and map Total on Hand or Qty by Bin to Bin Quantity.


Mapping Columns During Import
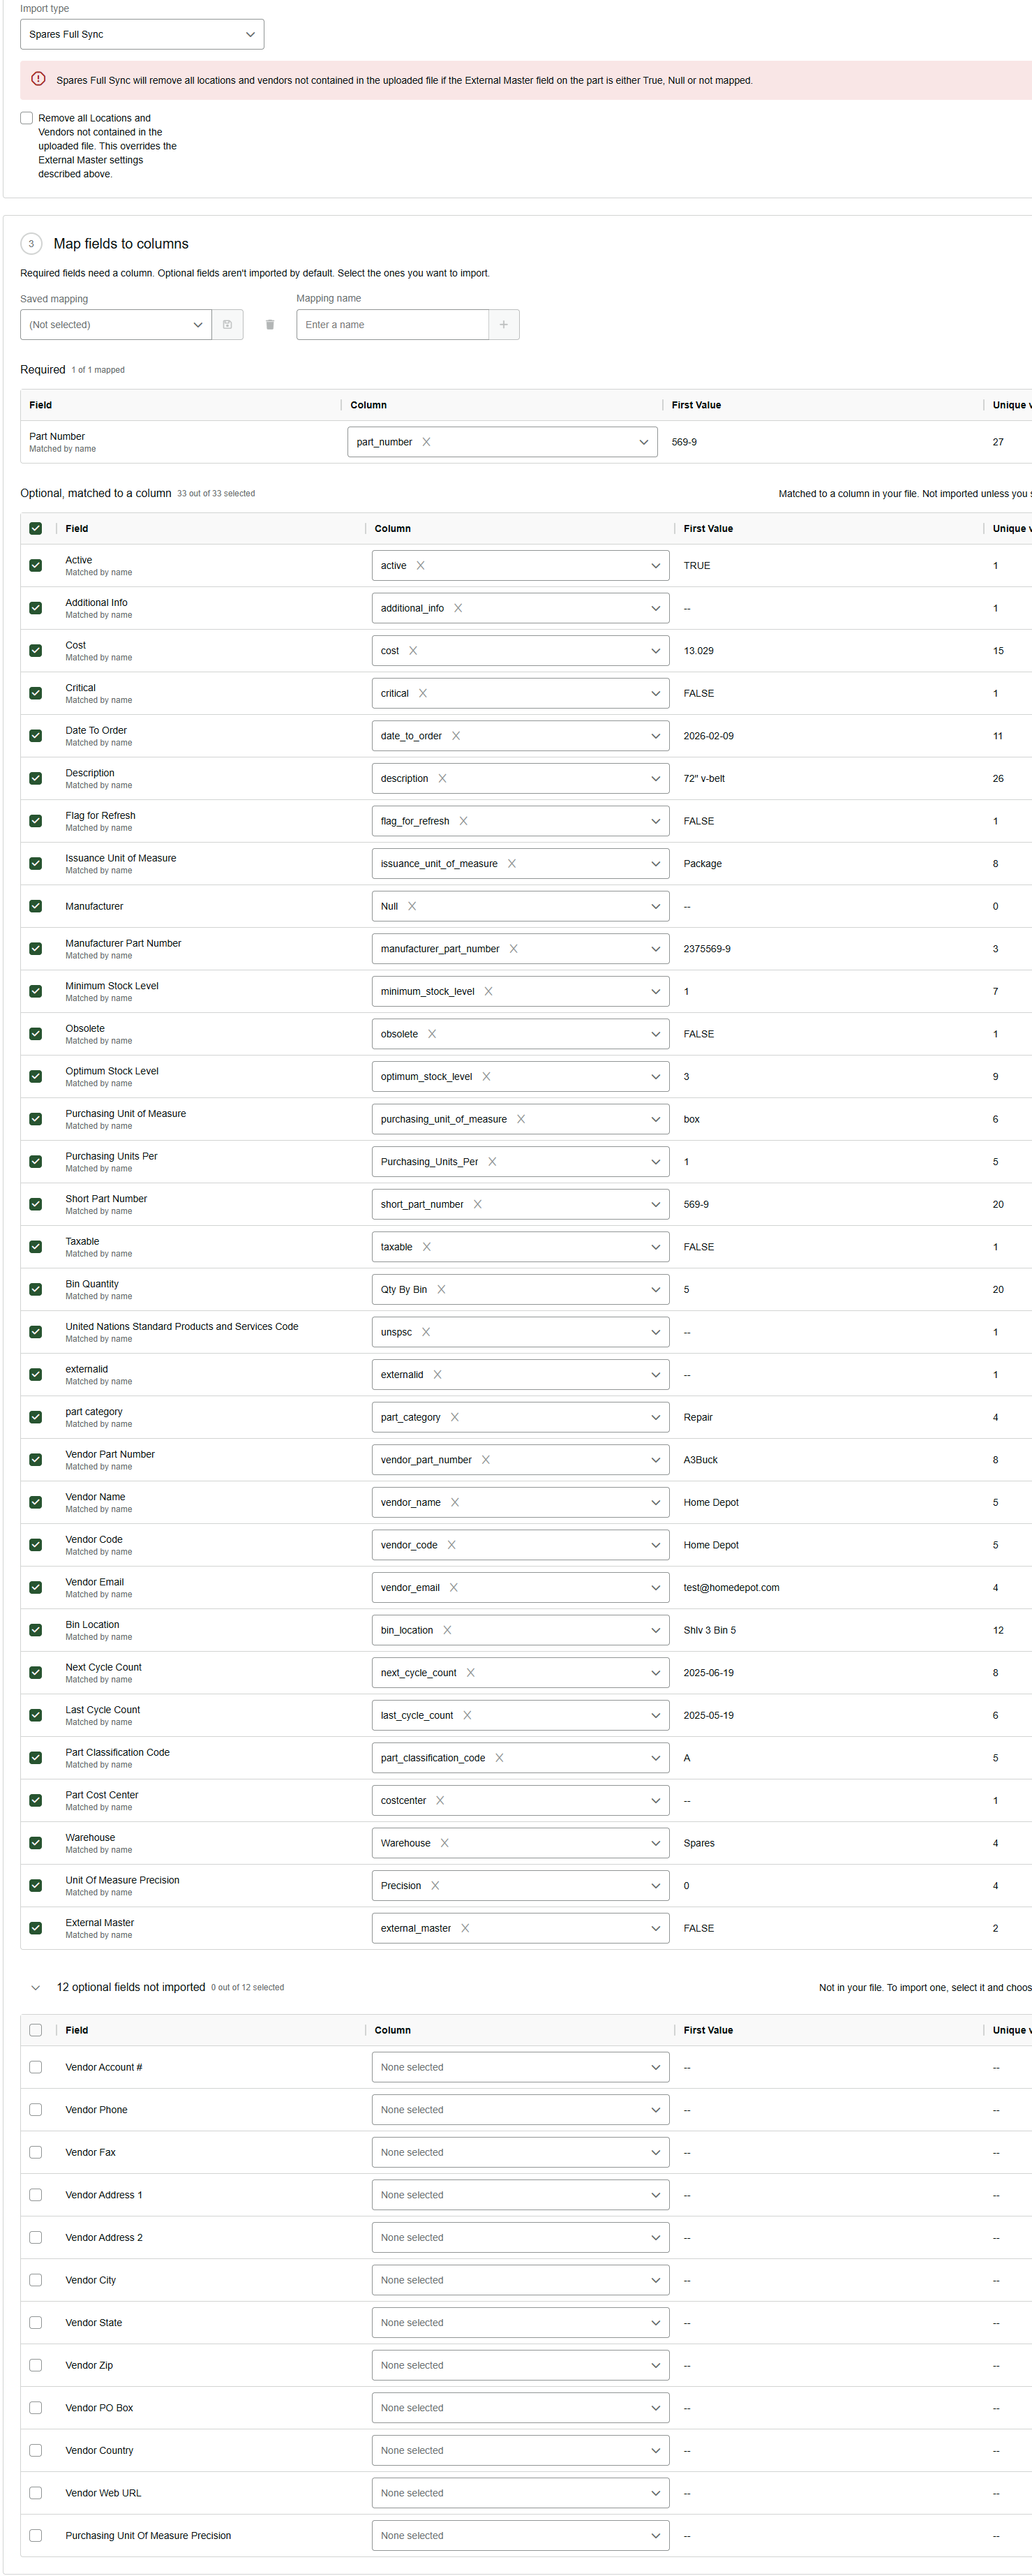
During the field-mapping step, you will match each L2L Table Mapping Name to the corresponding Column drop-down header from your spreadsheet.
Once all desired fields are mapped, click Import.
Automatic Alignment: If your spreadsheet uses the standard exported column headers, L2L will align the mappings automatically.
Excluding Columns: If a Table Mapping does not have a corresponding column in your spreadsheet or does not need to be imported, simply uncheck its box (will not Import).
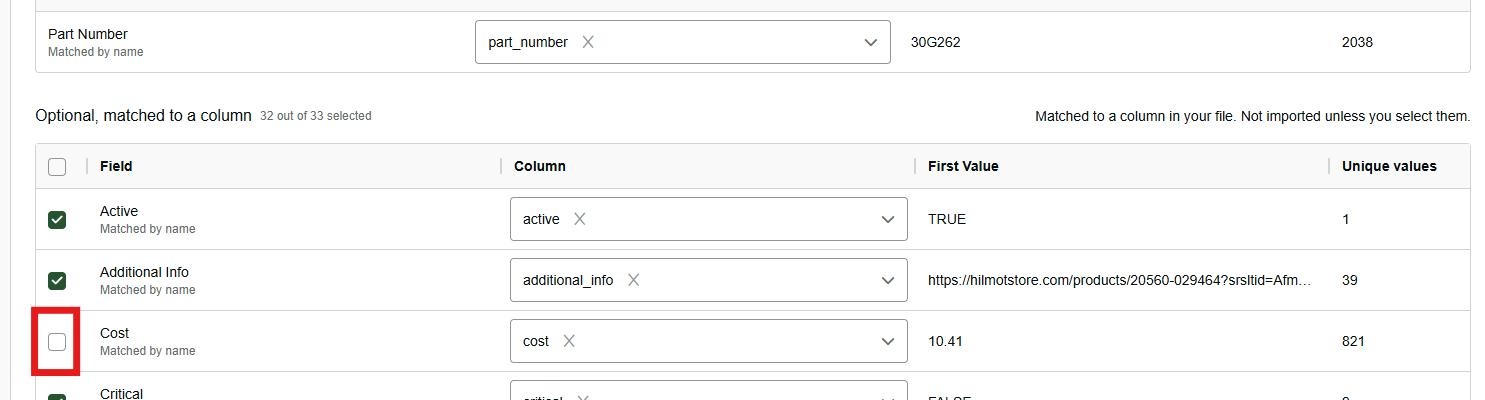
Hidden Excel Columns: Hiding columns in Excel does not prevent them from being imported—they are still present in the file. To exclude a column, either uncheck/unmap it during the import step or delete it from the spreadsheet entirely.
Staged Uploads with Incomplete Data: If you are importing parts without complete information (for example, loading parts now and adding vendor details later), map only the fields you currently have and uncheck the rest. You can add the missing information in a subsequent import—even if you only have access to Spares Full Sync and not Spares Vendors Sync.
Understanding External Master
The External Master field indicates which system serves as the master record for a spare part:
True (Default): The spare part is managed by an external system (such as an ERP, MRO, or external spreadsheet). L2L defaults parts to True if this field is left unmapped or null.
False: L2L is the master record for the spare part. (Note: Some L2L Spare reports only report on parts where External Master is set to False.)
While most sites set all spares uniformly to either True or False, a plant can mix settings if some parts are managed externally and others solely in L2L. Keep in mind that during a Spares Full Sync, L2L will remove any locations and vendors from parts in the system if they are missing from the uploaded file and the part's External Master field is True or unmapped.
Common Issues to Watch For
Vendor Code Conflicts: A Vendor Code can only have one Description in L2L. If the same Vendor Code appears with different descriptions in your file, those rows will fail with errors.
Part Classification Codes: When importing a classification code, L2L links to the existing classification and uses the description configured in your site. Ensure the codes in your file match what is set up in your site's Spares Settings.
Cost Center Codes: If you include a Part Cost Center Code, that cost center must already exist in your L2L site, or those rows will error.
Need Help with an Import?
You can run imports yourself through the Spares File Import menu, or send your completed spreadsheet to the L2L Support team to run it for you. If requesting assistance from support, be sure to specify whether you want a Full Sync or a Partial Sync.
Some Spare reports only report on Spare parts where the External Master is set to False.
When performing a Spares Sync, the upload tool will remove all locations and vendors from all parts in the system if the location or vendor is not included in the uploaded file and the External Master field on the part is either True or not mapped.