Cross-Site Document Sharing
Last updated: July 14, 2026
Setting Up Multi-Site Sharing
If your company manages multiple operational locations on the same server, you can share standard documentation across sites to eliminate duplicate work.
Open the document owned by your site.
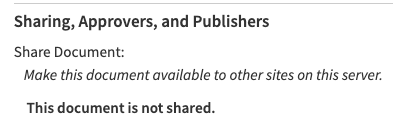
Locate the Share Document section.
Click Edit at the bottom of the section.
Select All Sites (Global Sharing) or choose individual target locations from the dropdown menu, then save.
Managing Shared Files (Receiving Sites)
Once shared, a document automatically appears on the receiving site under a dedicated 'Shared Documents' category tab.
⚠ Permissions Warning: Receiving sites cannot edit core document headers (Name, Description, Category, Active status). These fields remain entirely managed by the original "Owner Site."
However, receiving sites can independently customize how they use the file locally. From the shared file view, a receiving site can use its own local dropdown configurations to:
Link the document to local Scheduled Events, Skills, Work Orders, or Products.
Attach the document locally to local Dispatches.
Critical Constraints
Automated Dispatches: Documents cannot be shared if they use numeric Reject Limits or Yes/No triggers to launch automated dispatches. Because sister sites maintain unique local Dispatch Types and Trade settings, these automation rules block sharing.
Inactivation Rules: Inactivated documents cannot be shared. If an Owner Site re-activates a file, shares it, and later re-inactivates it, access is instantly revoked for all sister sites.
Non-Sequential Numbering: When cross-site sharing is active, document numbers are generated server-wide to avoid duplicates. If you create three documents in a row, your numbers might look like
123,124, and127. This is normal; numbers125and126were simply claimed by a user at a sister site during those exact moments.