Document Center Basics
Last updated: July 14, 2026
Navigating to the Document Center
To get started with site documentation, use the left-sided menu to navigate to Standard Work/Documents and select Documents.
Understanding Your Screen Views
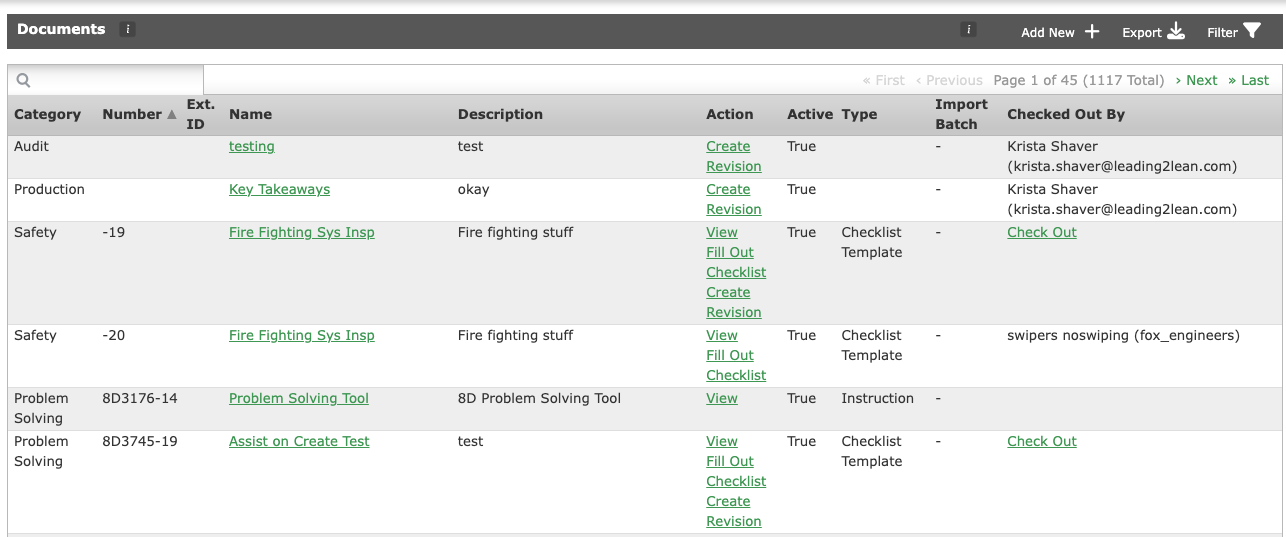
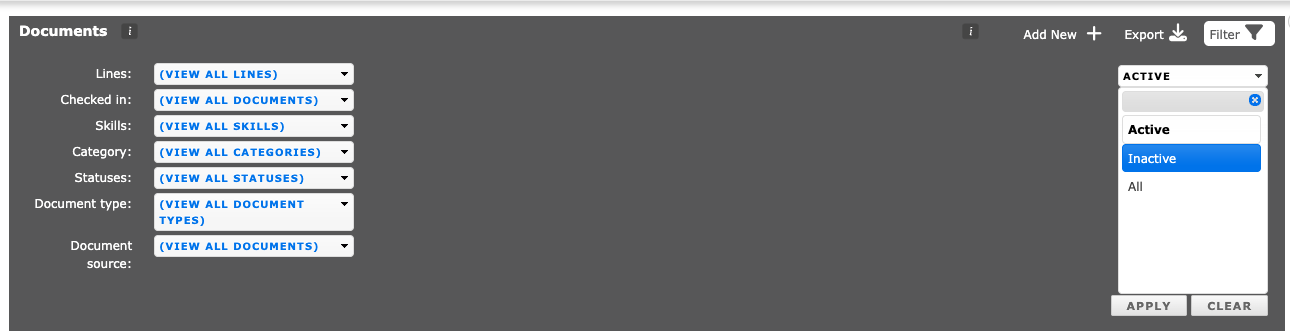
Documents List Screen: This view acts as your central repository. You can view, filter, and sort all site documents by Category, Number, External ID, Name, Description, Active status, Document Type, and who currently has the file checked out. To create a fresh file, click 'Add New+' in the top right corner.
Document Details Screen: Think of this as the "cover page" for your file. You can access it by clicking an existing document or when starting a new one.
Document Descriptors
Every new document requires three core elements before it can be saved:
Name: A clear, concise title.
Description: Context regarding the purpose and content of the item.
Category: The subject group or content type used to organize your library.
Note: If your system integrates with an external document management system, you can also fill in the External ID field.
If you've already created the document, there is another set of features.
Associated Active Skills will show you any skills that this document is attached to.
Revision Changes will show you the most recent revisions' comments on changes made or if a document is pending approval/publishing.
History will give you the last updated, created on and published on dates and user that made the changes.
Buttons: Edit, Cancel, Create Revision, View Associations. (Note: View associations allows you to see all ASSOCIATED Work Orders, Dispatches, etc. )
Checklist Only Buttons: View Template, Fill Out New Checklist: allows you to fill out a checklist unrelated to an event, View Open/Closed Checklists: Allows you to view checklists that are in process or completed, Copy Checklist: You can copy the checklist, change the name of the new one and add or delete tasks as needed. Please note that you cannot have a description beyond 255 characters when copying checklists.
Inactivating Documents
To keep your system clean, documents cannot be permanently deleted. Instead, they must be inactivated to remove them from general visibility.
Go to the Document Center.
Open the specific document.
Scroll to the bottom and select Edit Document.
Near the top of the page, uncheck the Active box.
Click Save at the bottom of the page.